
––––––––––––––––––––––––––––––––––––––––––––––––––
In my previous post I jerry-rigged an AUX input for my car's stereo. It worked alight, but as you can see in the photos it wasn't pretty -- I mean, who wants a cord dangling out of their tape deck tray?
I decided to scrap that and re-wire it with Bluetooth connectivity. I spent $15 dollars on the entire project (keys to remove stereo and the Bluetooth receiver) and now my phone plays through my car's stereo system without a hitch. Here's how I did it!
First I picked up one of these guys. The idea is that you power the unit via USB, plug in your stereo jack, and tether to it wirelessly with any Bluetooth enabled device. I'm not endorsing this brand in particular, it was just cheap and it does what I need.


You can make out the GND and 5V copper strips. Awesome, so to power this unit I just need a 5V DC source. I assumed my car's stereo has that somewhere, since it's filled with modern circuit boards.
Here's the other side of the unit. You can see the main controller and the antenna. Most of the soldering looks surprisingly decent.

OK, so now I'm ready to solder on some leads.
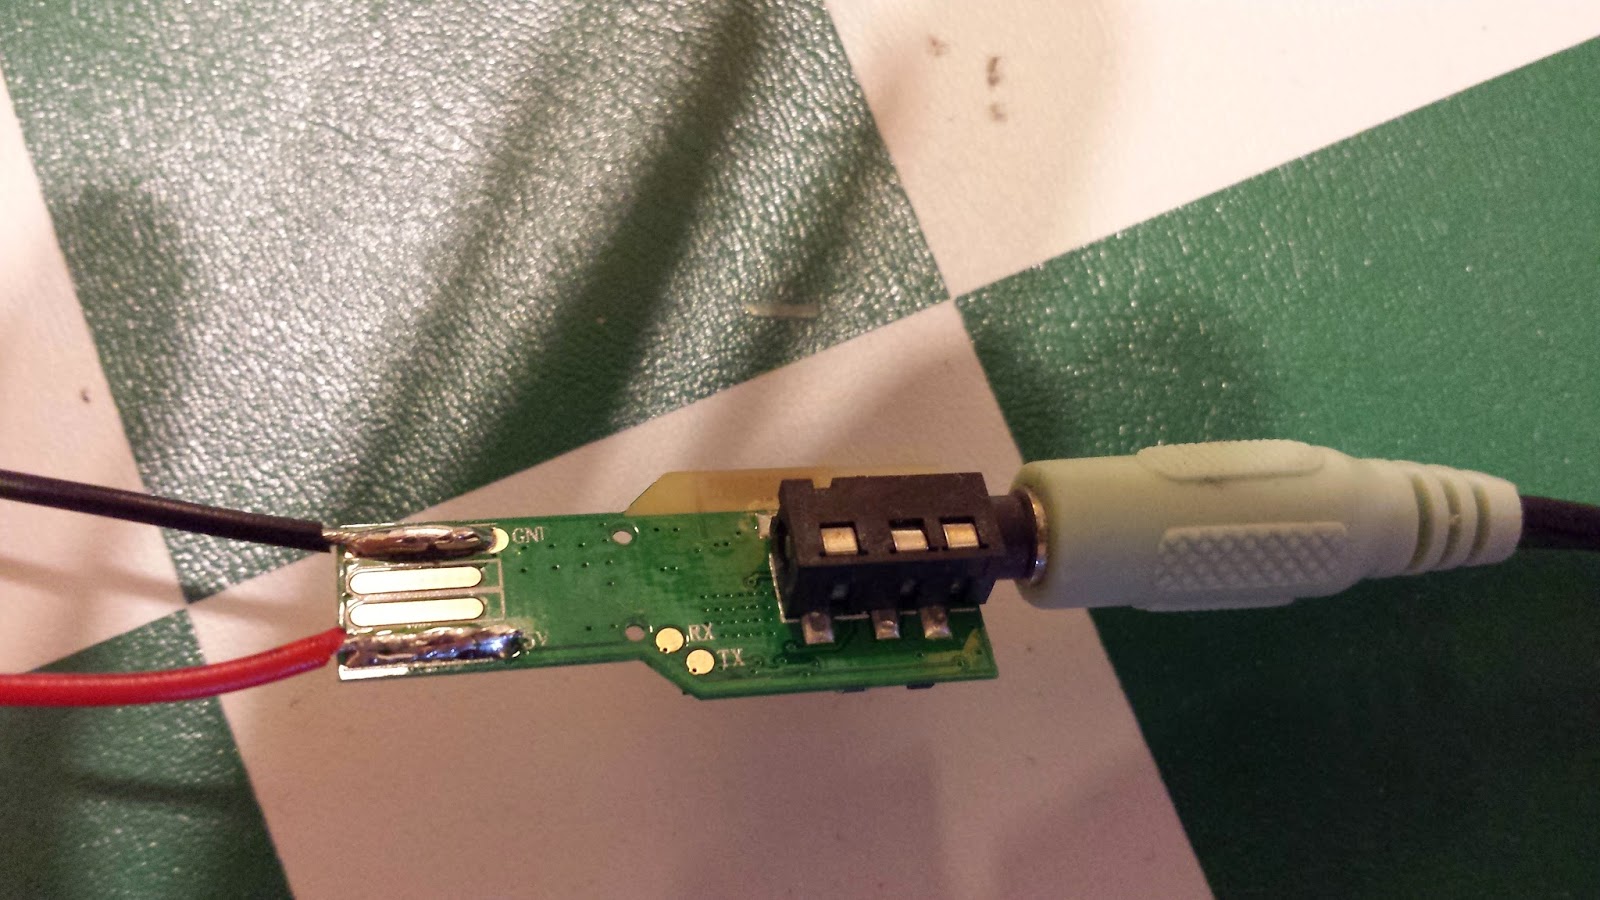
I used some flux on the copper strips first and then pre-tinned them and the wires -- I want this to be secure as hell.
Next up is testing. I hook up the power lines to my homemade variable power supply (yes, that used to be an alarm clock) and make sure I can play music from my phone to my room's speaker system.

Alright, that worked so I moved on to attaching an audio jack with open leads on one end, then commenced with liberal shrink-tubing.

Cover that up completely.

Alright, now what? Now what is crack that stereo system out!

So as I discussed in my last post, I found where the CD player sends left and right channel audio information out to the main amplifier. I hijacked those leads and connected them to the audio out of my Bluetooth receiver. Piece of cake. But now where the hell am I going to find 5 Volts? Look closely:

Now, do I know with absolute certainty that "P5V" with a solder test point next to it is a 5V DC lead? No. But am I going to go ahead and solder my cable there anyway? You betcha.
And here are the connections for Left and Right Channel audio.

Here's everything wired and sticking out hideously from the tape deck. For ground I soldered my cables directly onto the chassis.

Shove it in.

Finally I plugged this bad boy in and tested it. Worked like a damned charm, after fixing a couple of ground loop issues. Since I'm using my CD player's output, I have to trick the stereo system into thinking that a CD's playing. For that I burned an album with 10 hours of absolute silence. That did the trick.

So now I turn on my stereo, my phone automatically pairs to the Bluetooth receiver, and all of my phone's audio output (music, calls, etc) get routed through my car's speaker system. For the cost of a couple overpriced coffees.
That's it. Rock on and don't forget to be awesome.
Just curious, how is the sound quality? I'm thinking about doing something similar, but I've had some bad experience with cheap bluetooth chips.
ReplyDeleteThe sound's fine, I can't even notice any pitfalls. I'm no audiophile, though.
DeleteI already have a DC to usb power adapter in my car. I could just plug this module into that and then wire it to the input like you did, right?
ReplyDeleteAlso curious about the sound quality.
Yep. I think the sound quality is more than fine, certainly for driving. I don't notice a difference between the sound quality via bluetooth vs listening to a CD.
DeleteWhat ground loop issues did you have? How did you solve them?
ReplyDeleteI assumed it was a ground loop issue, but I wasn't sure. I noticed that I got a bunch of humming and pulsating static when I used the audio ground as a power ground, so I soldered the power ground directly to the chassis and that did the trick.
DeleteHow did you solder to the P5V lead? Was it also a segment of the ribbon strip like the RCH/LCh/GRND, or did you have to solder directly to the board?
ReplyDelete